Feedback Rocket - Integration Guides - Notification ChannelsZapier
Sending feedback notifications to Zapier allows you to connect to the 5,000+ applications supported by the Zapier Automation Platform. You’ll need a Zapier account, but creating one is free and easy. Zapier acts as a middleman between two applications: the source in this case is Feedback Rocket and the destination is almost whatever you want—as long as it’s one of the thousands of applications supported by Zapier!
Make a Zap
Assuming you’ve created yourself a free Zapier account and logged into the platform, you’ll land on your Zapier dashboard from where you can very quickly scaffold a new ‘Zap’. For the purposes of this guide we’re going to integrate with Trello and create a new card whenever we receive feedback, but the same principles will apply to any other application you want to integrate with.
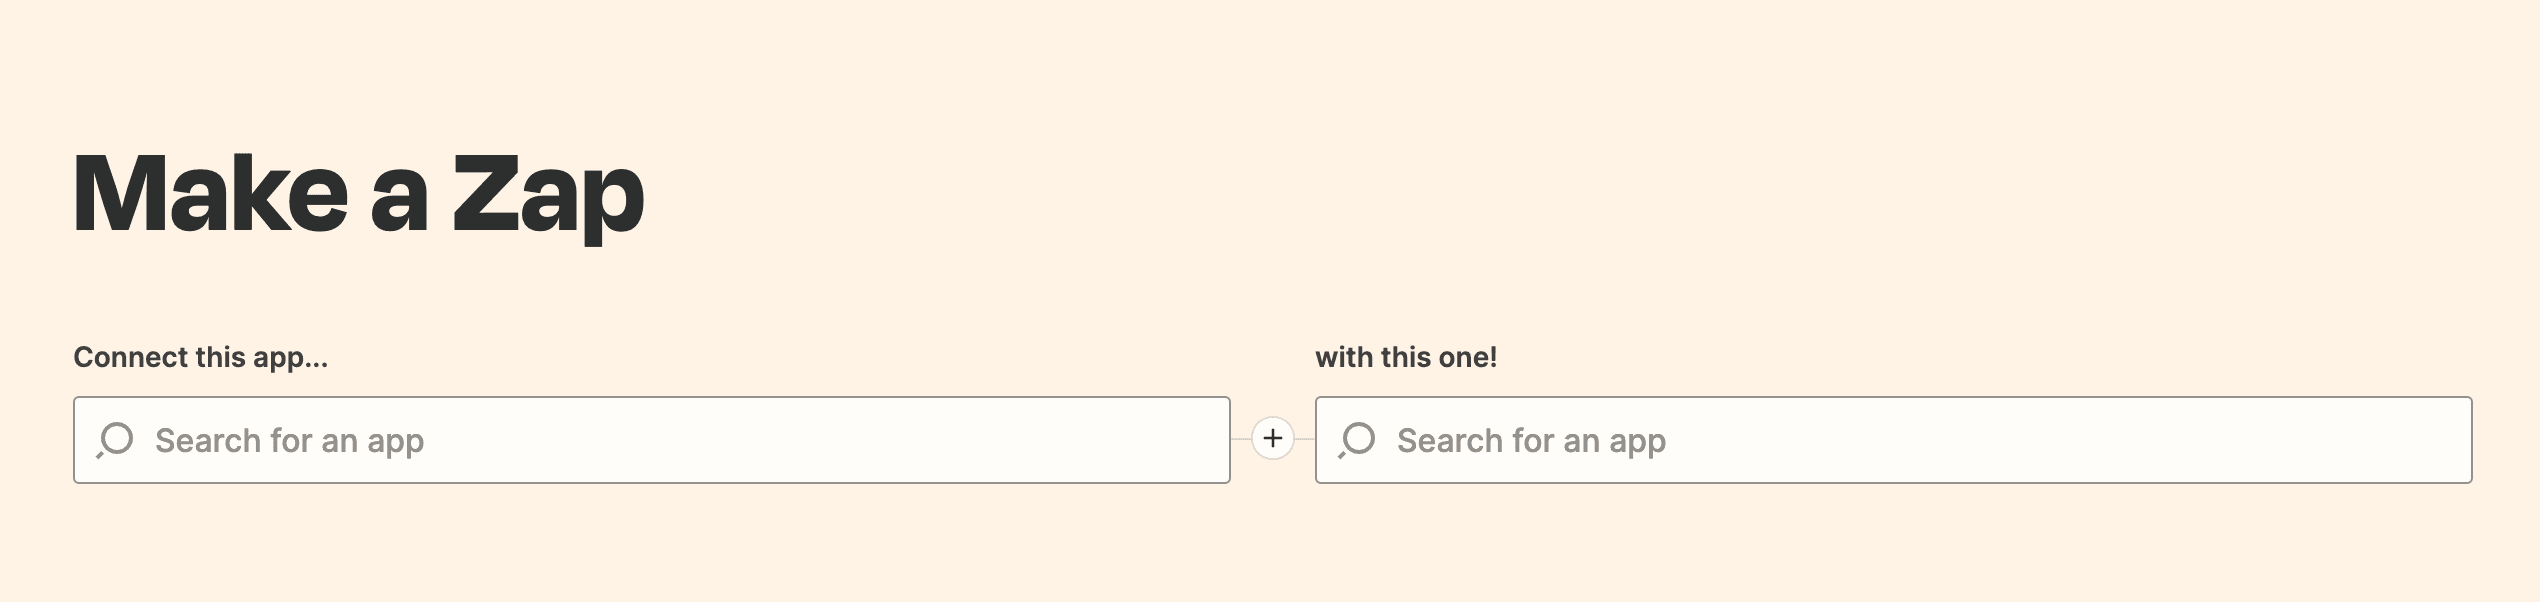
- In the ‘Connect this app...’ input box, type ‘email’ and then select the ‘Email by Zapier’ option.
- In the ‘with this one!’ input box, type ‘trello’ and then select the ‘Trello’ option.
At this point, a couple more options will appear.
- In the ‘When this happens...; input box, select the ‘New inbound email’ option.
- In the ‘with this one!’ input box, select the ‘Create Card’ option.
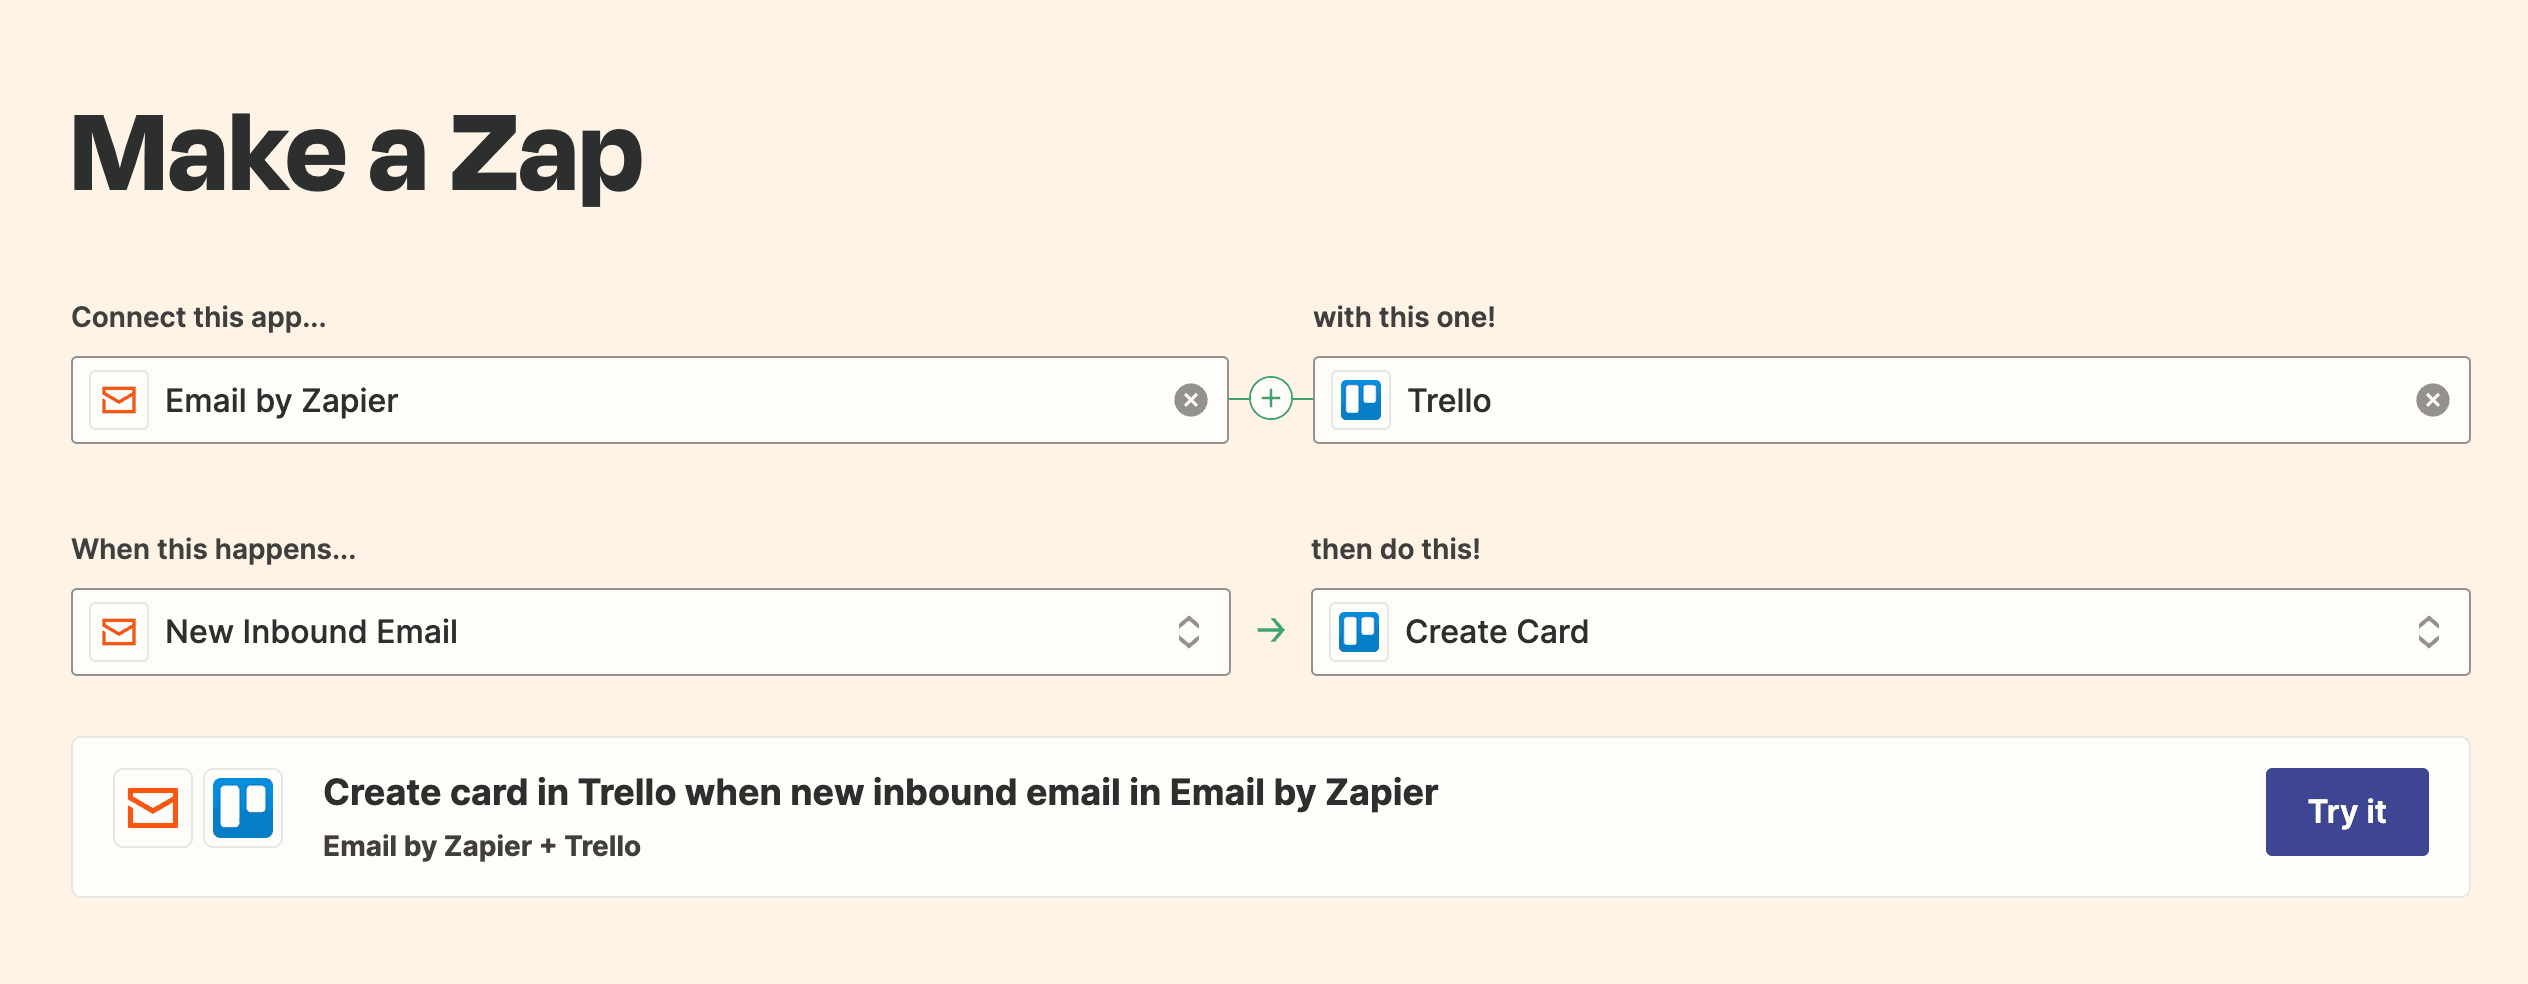
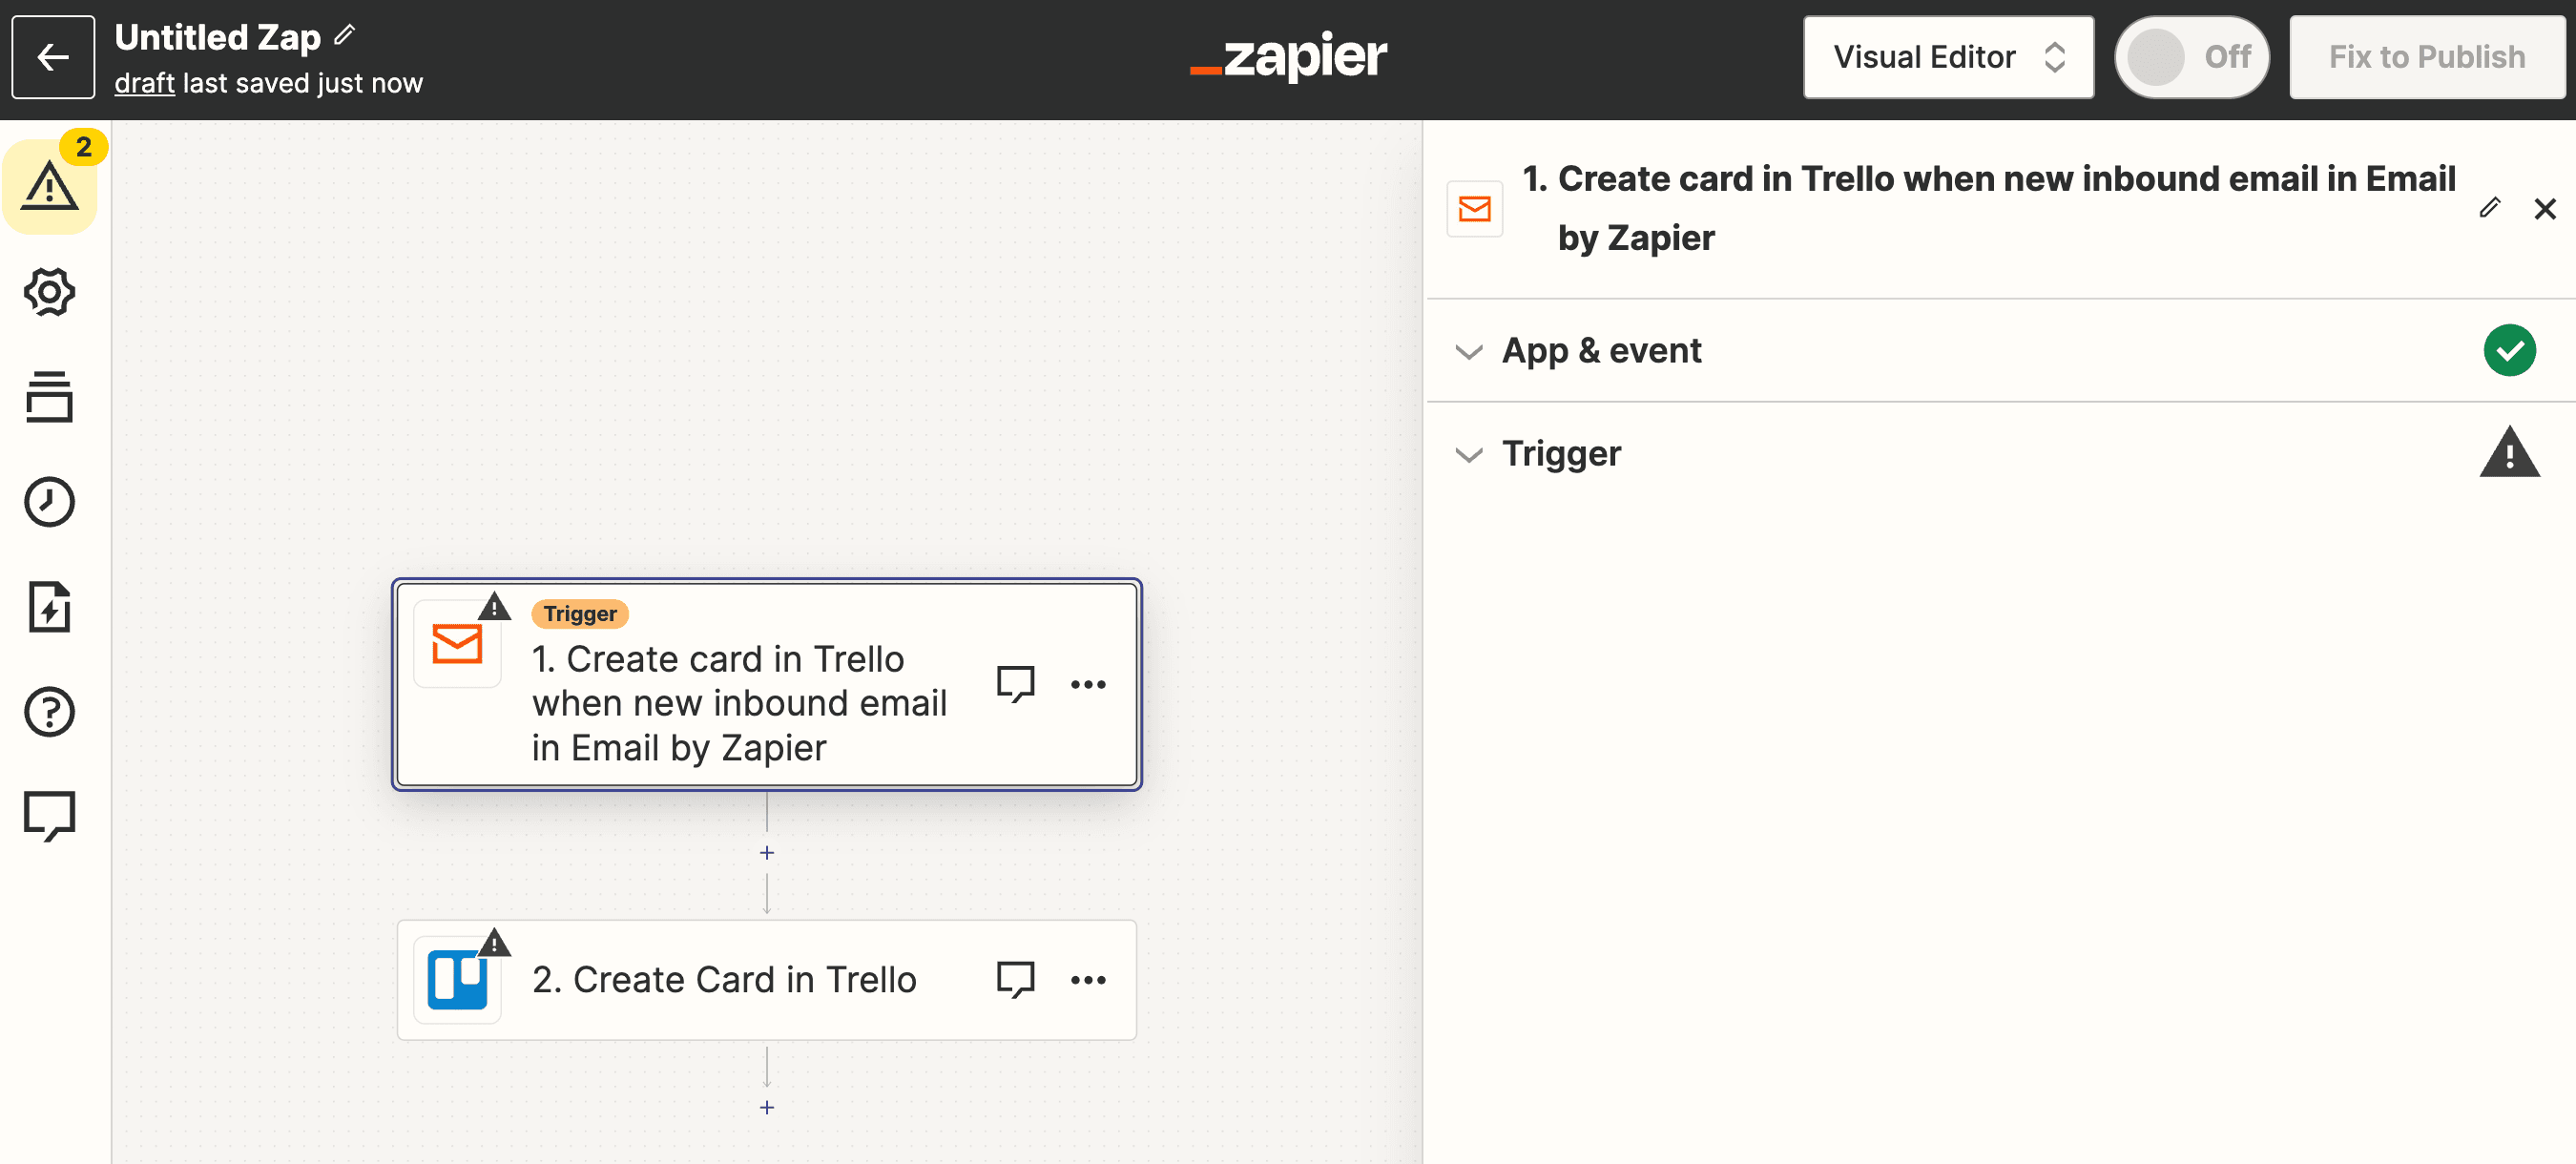
Go ahead and hit the ‘Try it’ button. You’ll end up on the Zapier Visual Editor page which can look a little overwhelming at first, but it’s actually pretty simple once you get the hang of it.
Configure the Zap
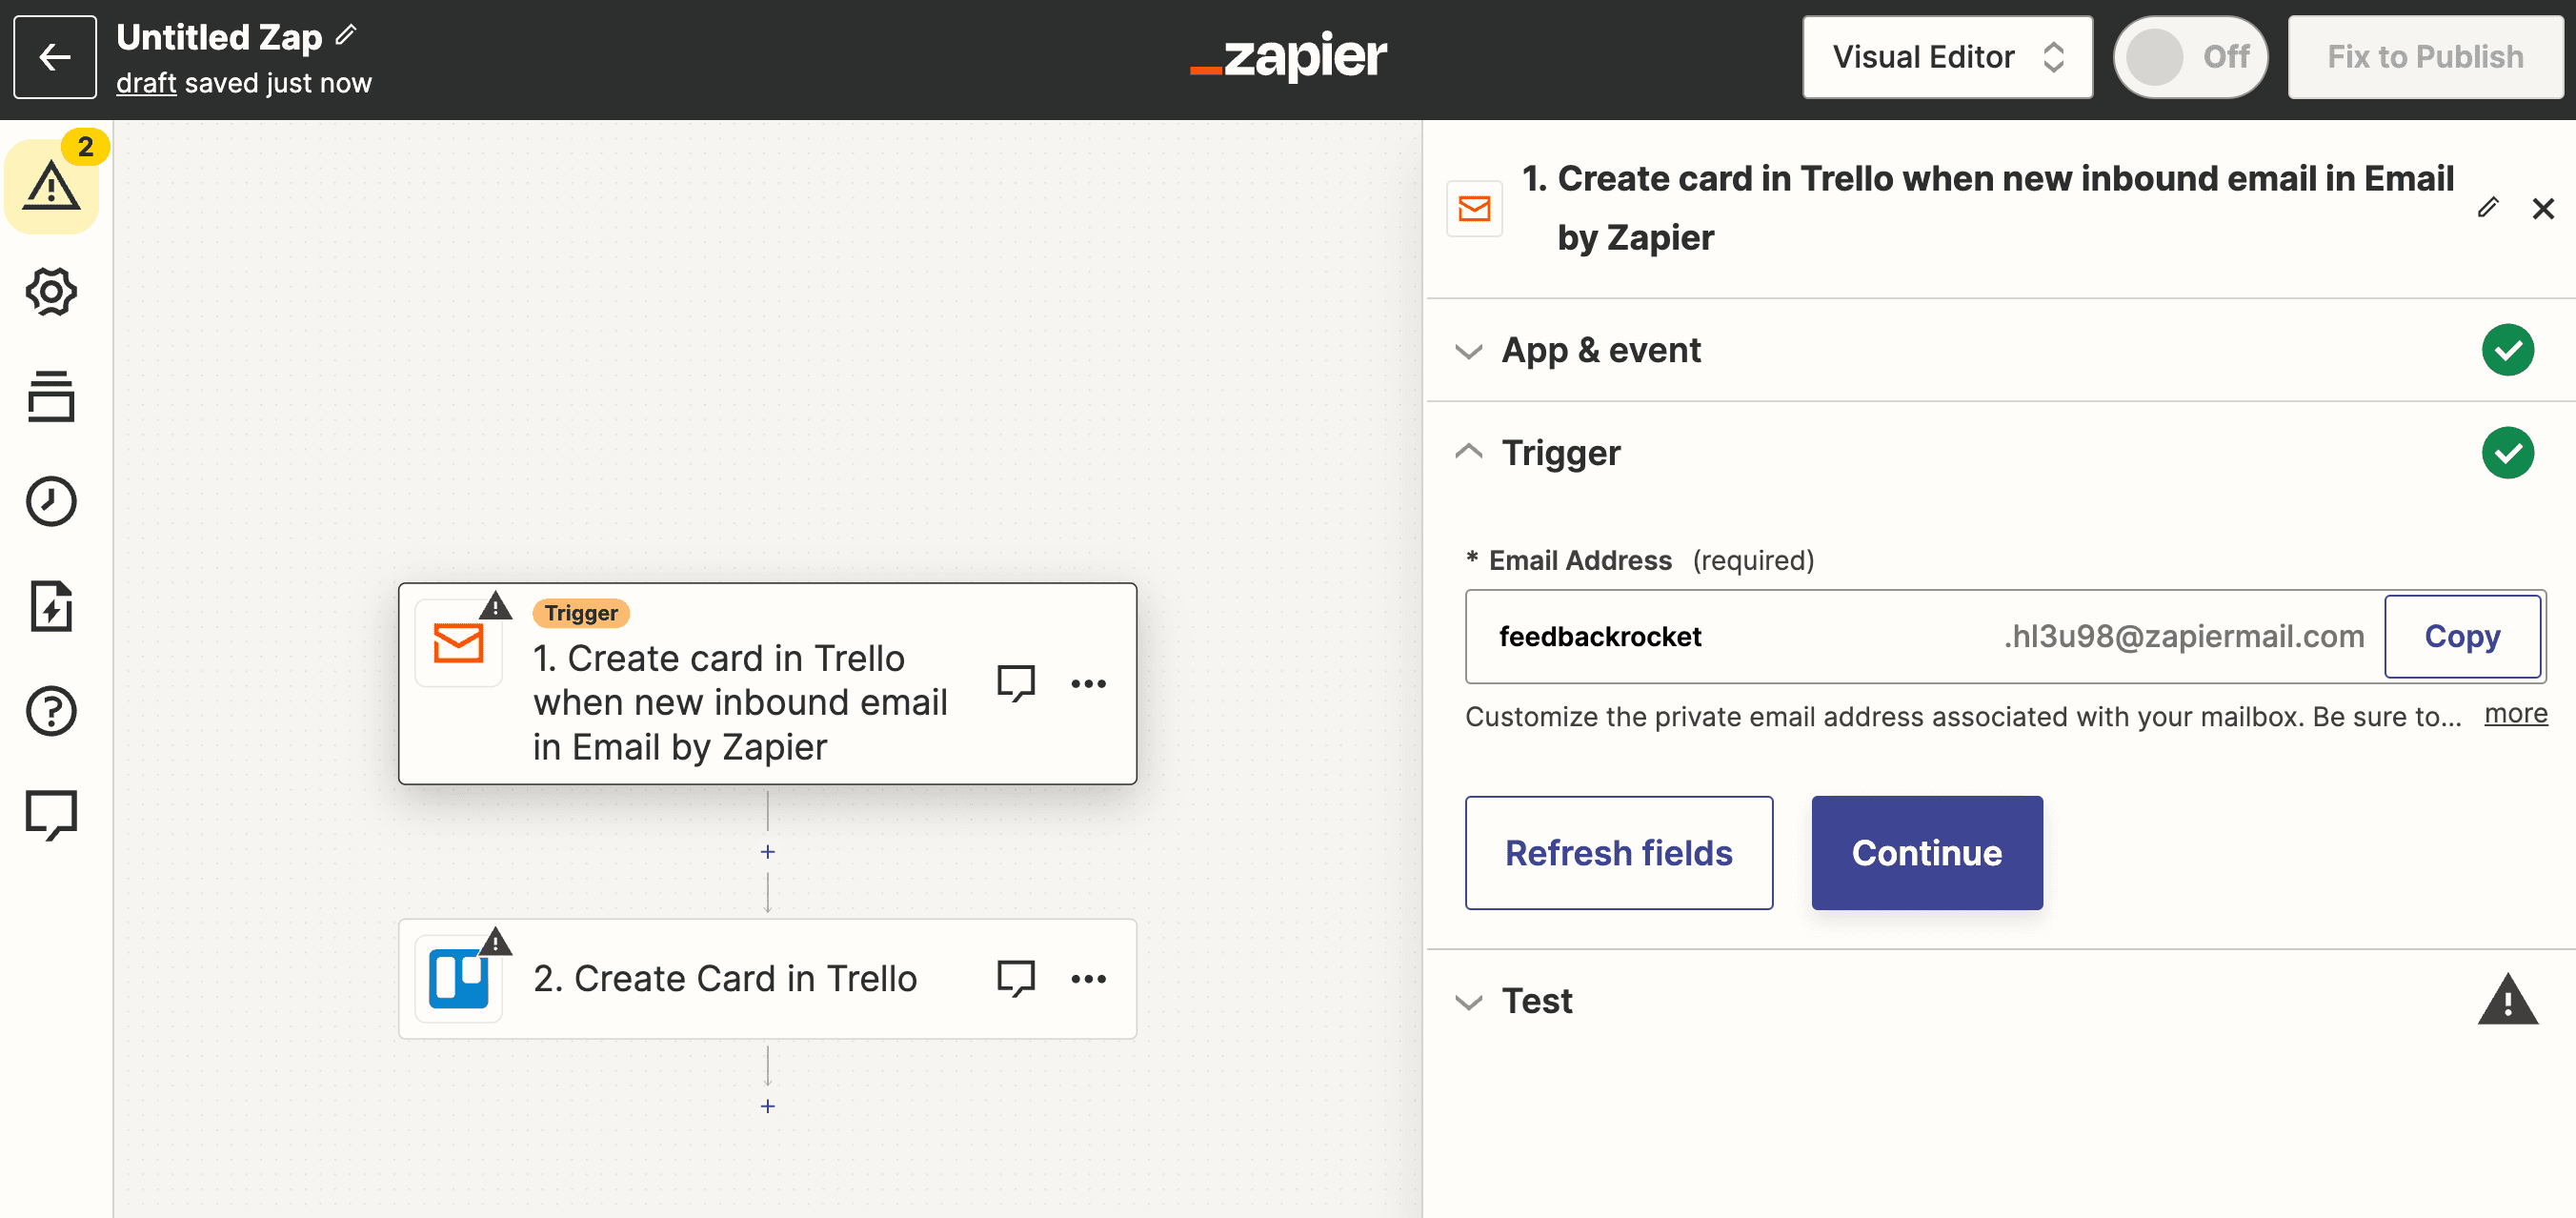
You might notice the yellow triangle in the top-left hand corner of the screen indicating that we have two items which need attention. Click on that icon and you’ll see the following:
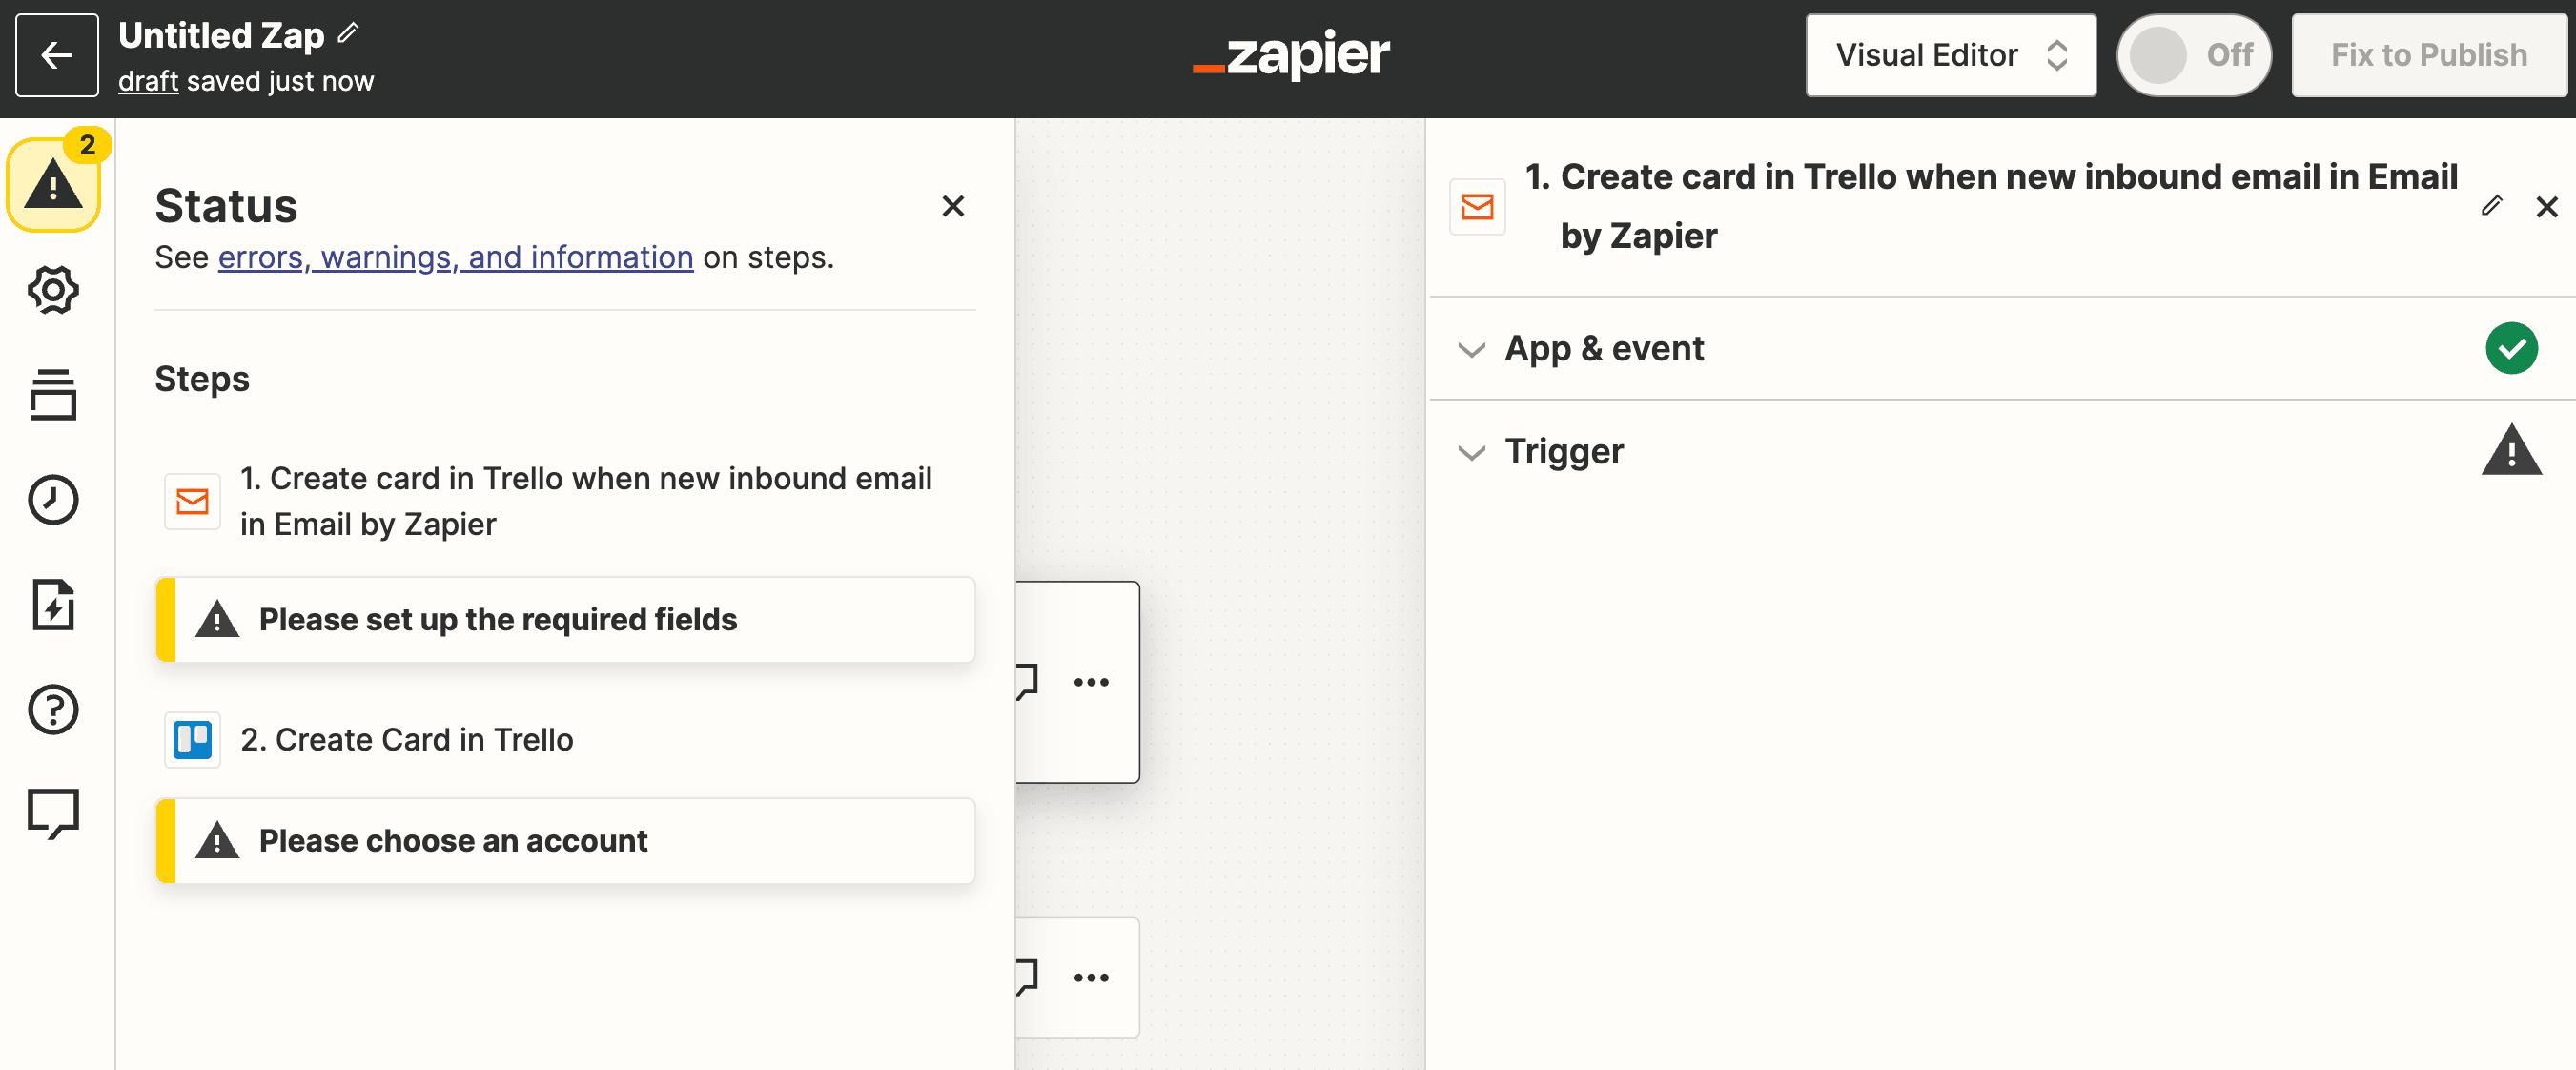
These errors make sense since we haven’t told Zapier where it should read email from and which Trello board it should send it to. First of all, let’s configure the inbound trigger by expanding the ‘Trigger’ section on the right hand side of the screen and providing an email address which will receive notifications from Feedback Rocket. In the example below I’ve just gone with ‘feedbackrocket’—Zapier will automatically append a subdomain and the @zapiermail.com domain after it. Once entered, click ‘Continue’.
Quite sensibly, Zapier wants us to test the integration before we go any further. This isn’t mandatory but it’s strongly recommended. Head back to Feedback Rocket, enable Zapier notifications, and copy and paste in the email address you just entered in Zapier into the ‘Zapier email address’ field:
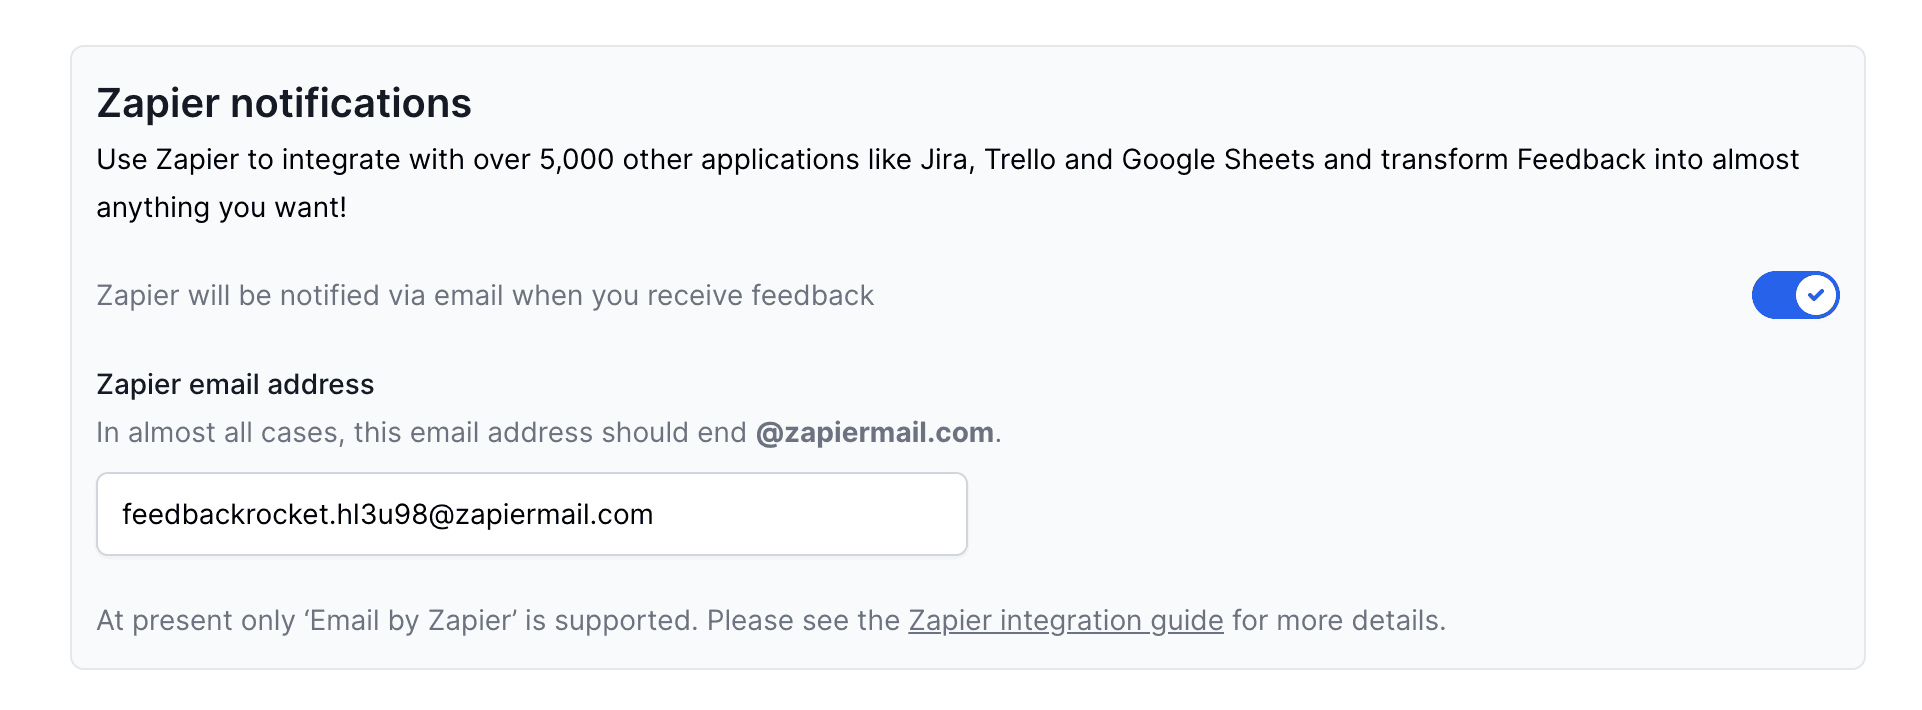
Please don’t enter this email address into the normal ‘Email notifications’ section at the top of the page! The email sent to Zapier is specially formatted in a way that Zapier understands and can parse. Normal emails are designed to be human-readable, but Zapier won’t be able to make sense of them. You can of course enable both notification options at once if you want.
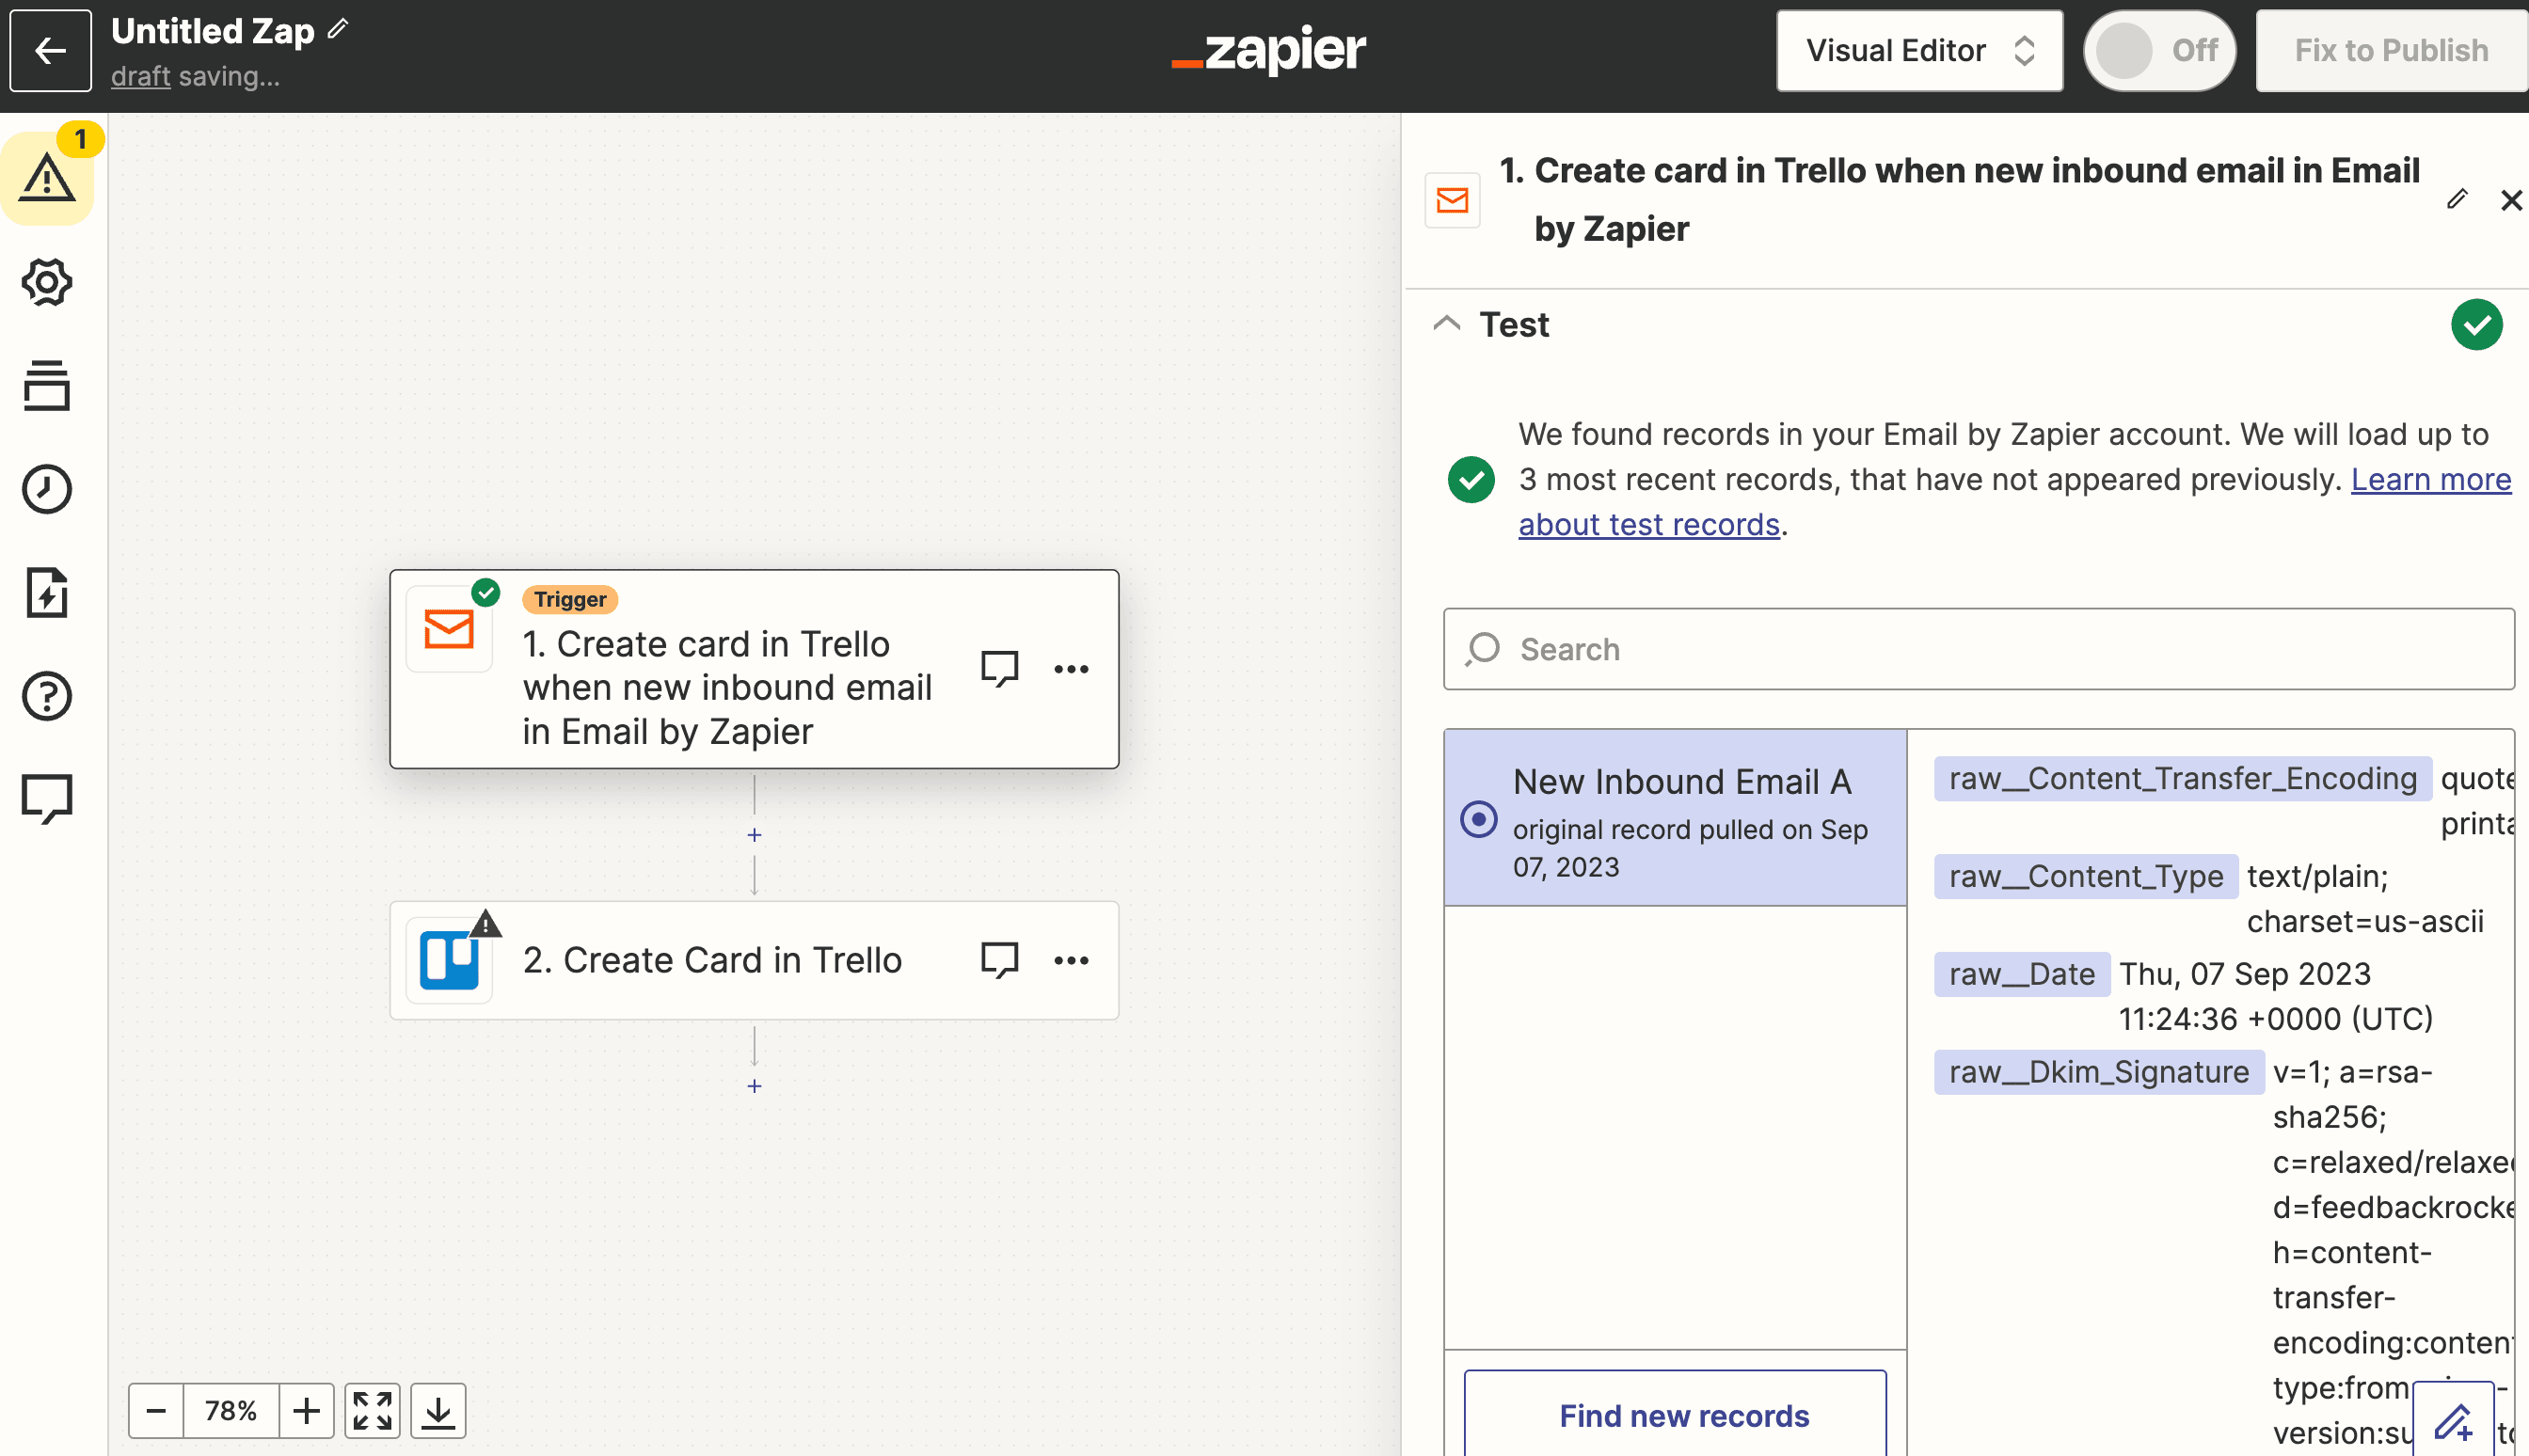
Send yourself a quick test Feedback Rocket notification, and then back on Zapier click ‘Test’. You should see a “New Inbound Email” table appear much like the screenshot below—ignore the details for now! If you don’t see it, wait a minute and try again and double check you’ve entered the correct @zapiermail.com address in Feedback Rocket under the ‘Zapier notifications’ section.
Connect to Trello
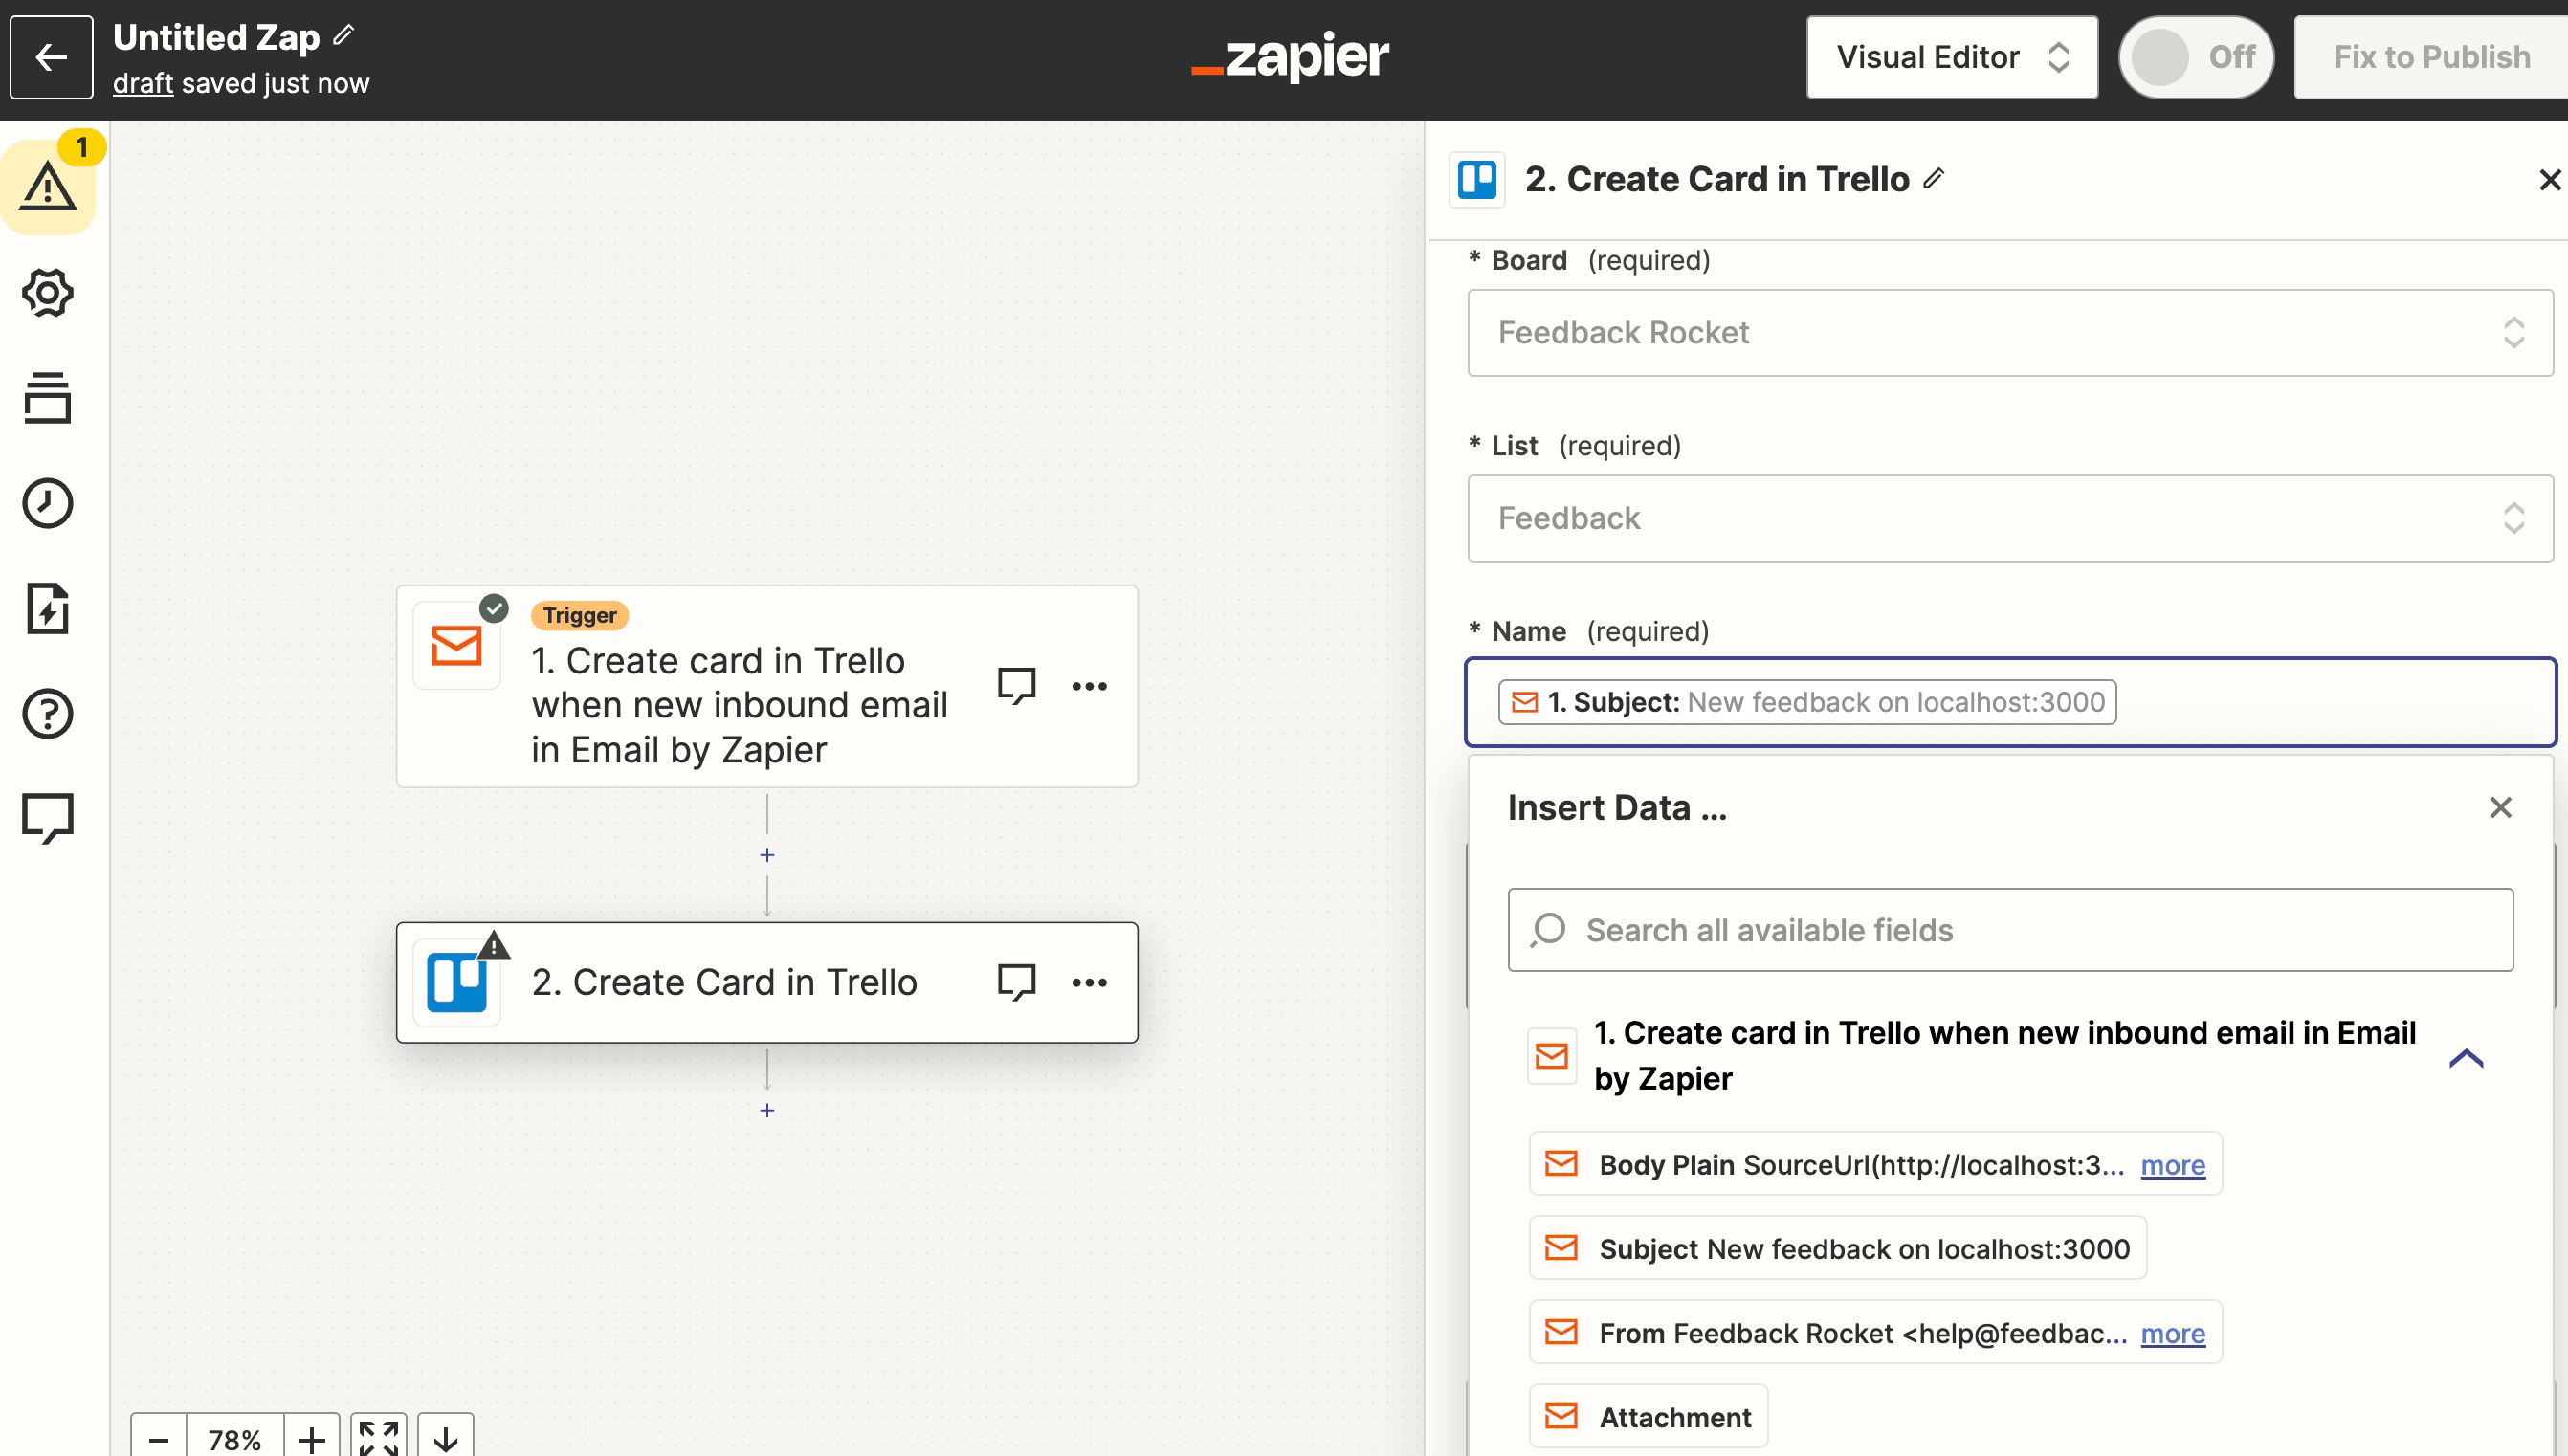
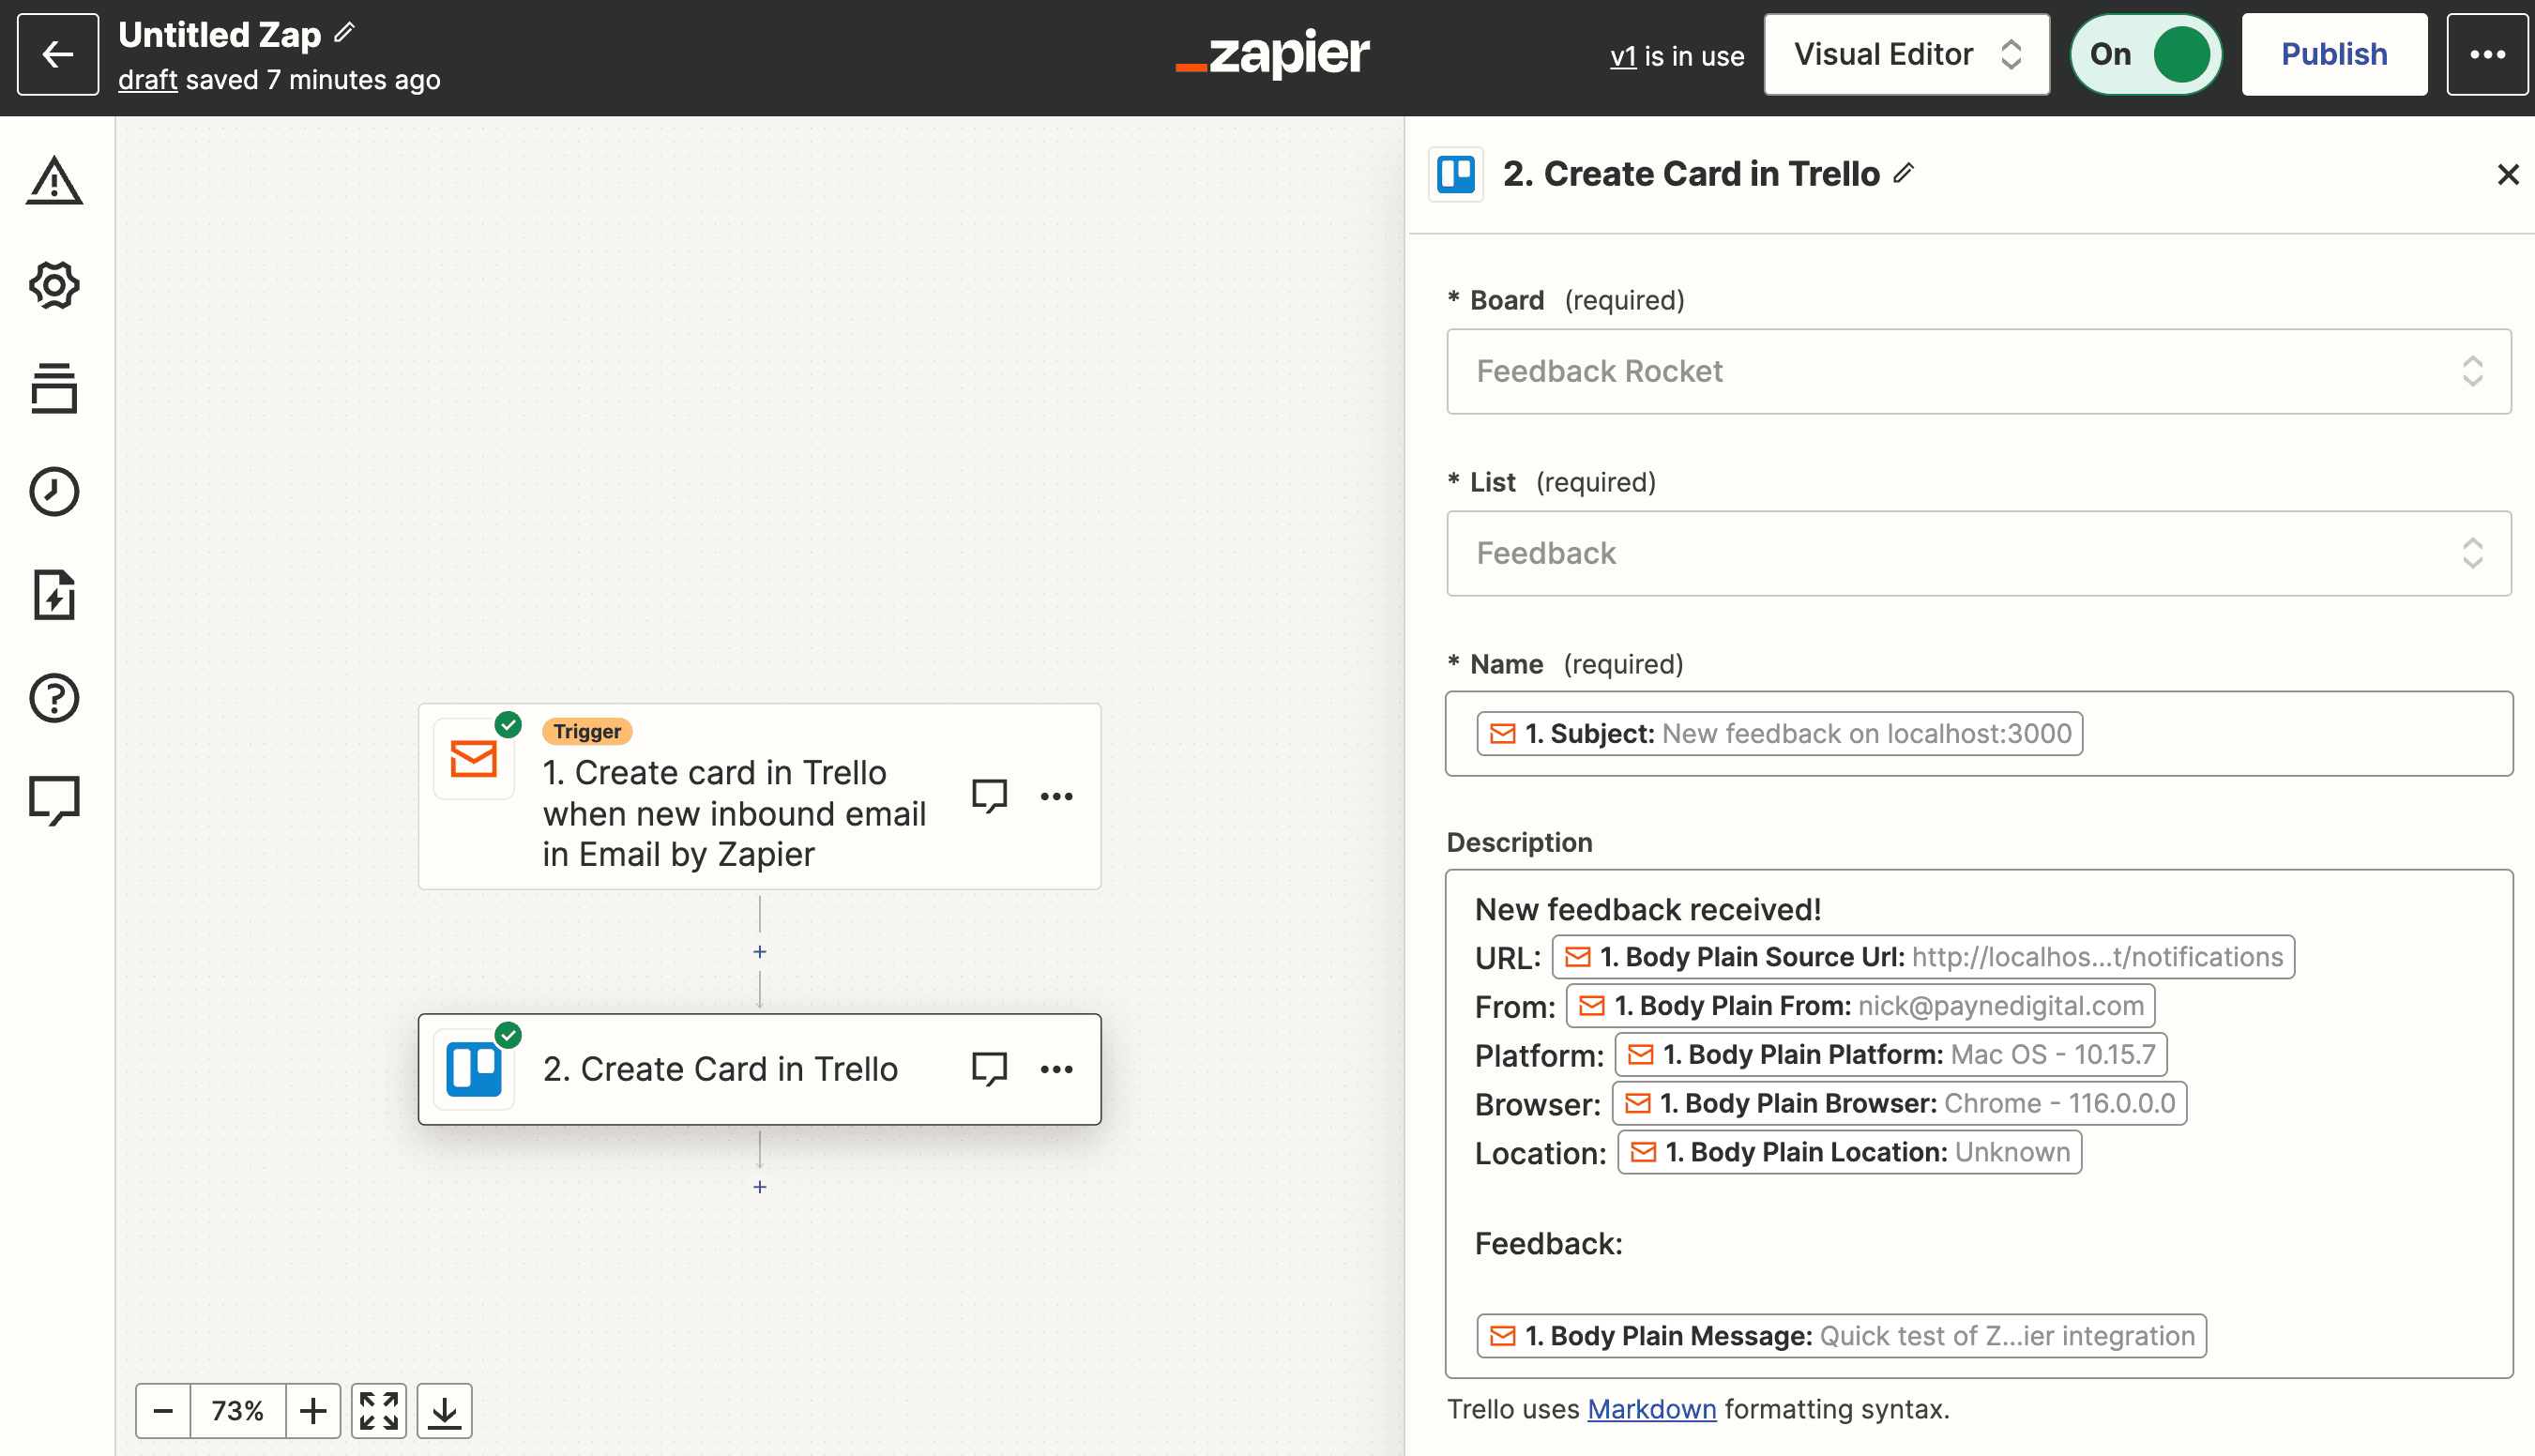
Okay—half way there! Now for the fun part: telling Zapier what to do with that email. We’ll skip the part about linking your Trello account to Zapier itself as Zapier does a great job of guiding you through that process itself. Assuming your account is linked, the next thing to do is choose the board, list and other details of the card you want to create. First up is the card name, for which we’re just going to re-use the subject of the email sent to Zapier:
Now just the card details to populate. Feedback Rocket sends Zapier the details of every piece of feedback received in ways Zapier can automatically understand and parse from the email itself. We don’t have full control over what those fields are called so they may appear a little strange, but you can use them reliably in any Zap you create. They are:
- Body Plain Source Url: the URL the user was looking at when they sent their feedback
- Body Plain From: if you have the
reply-tosetting enabled, this will be the email address the user provided - Body Plain Platform: the user’s operating system and approximate version
- Body Plain Browser: the user’s browser and approximate version
- Body Plain Location: the user’s approximate geographical location, inferred from their IP address
- Body Plain Message: the user’s actual feedback
In the screenshot below, we’re dropping these fields into a template we’re using for the description of each Trello card:
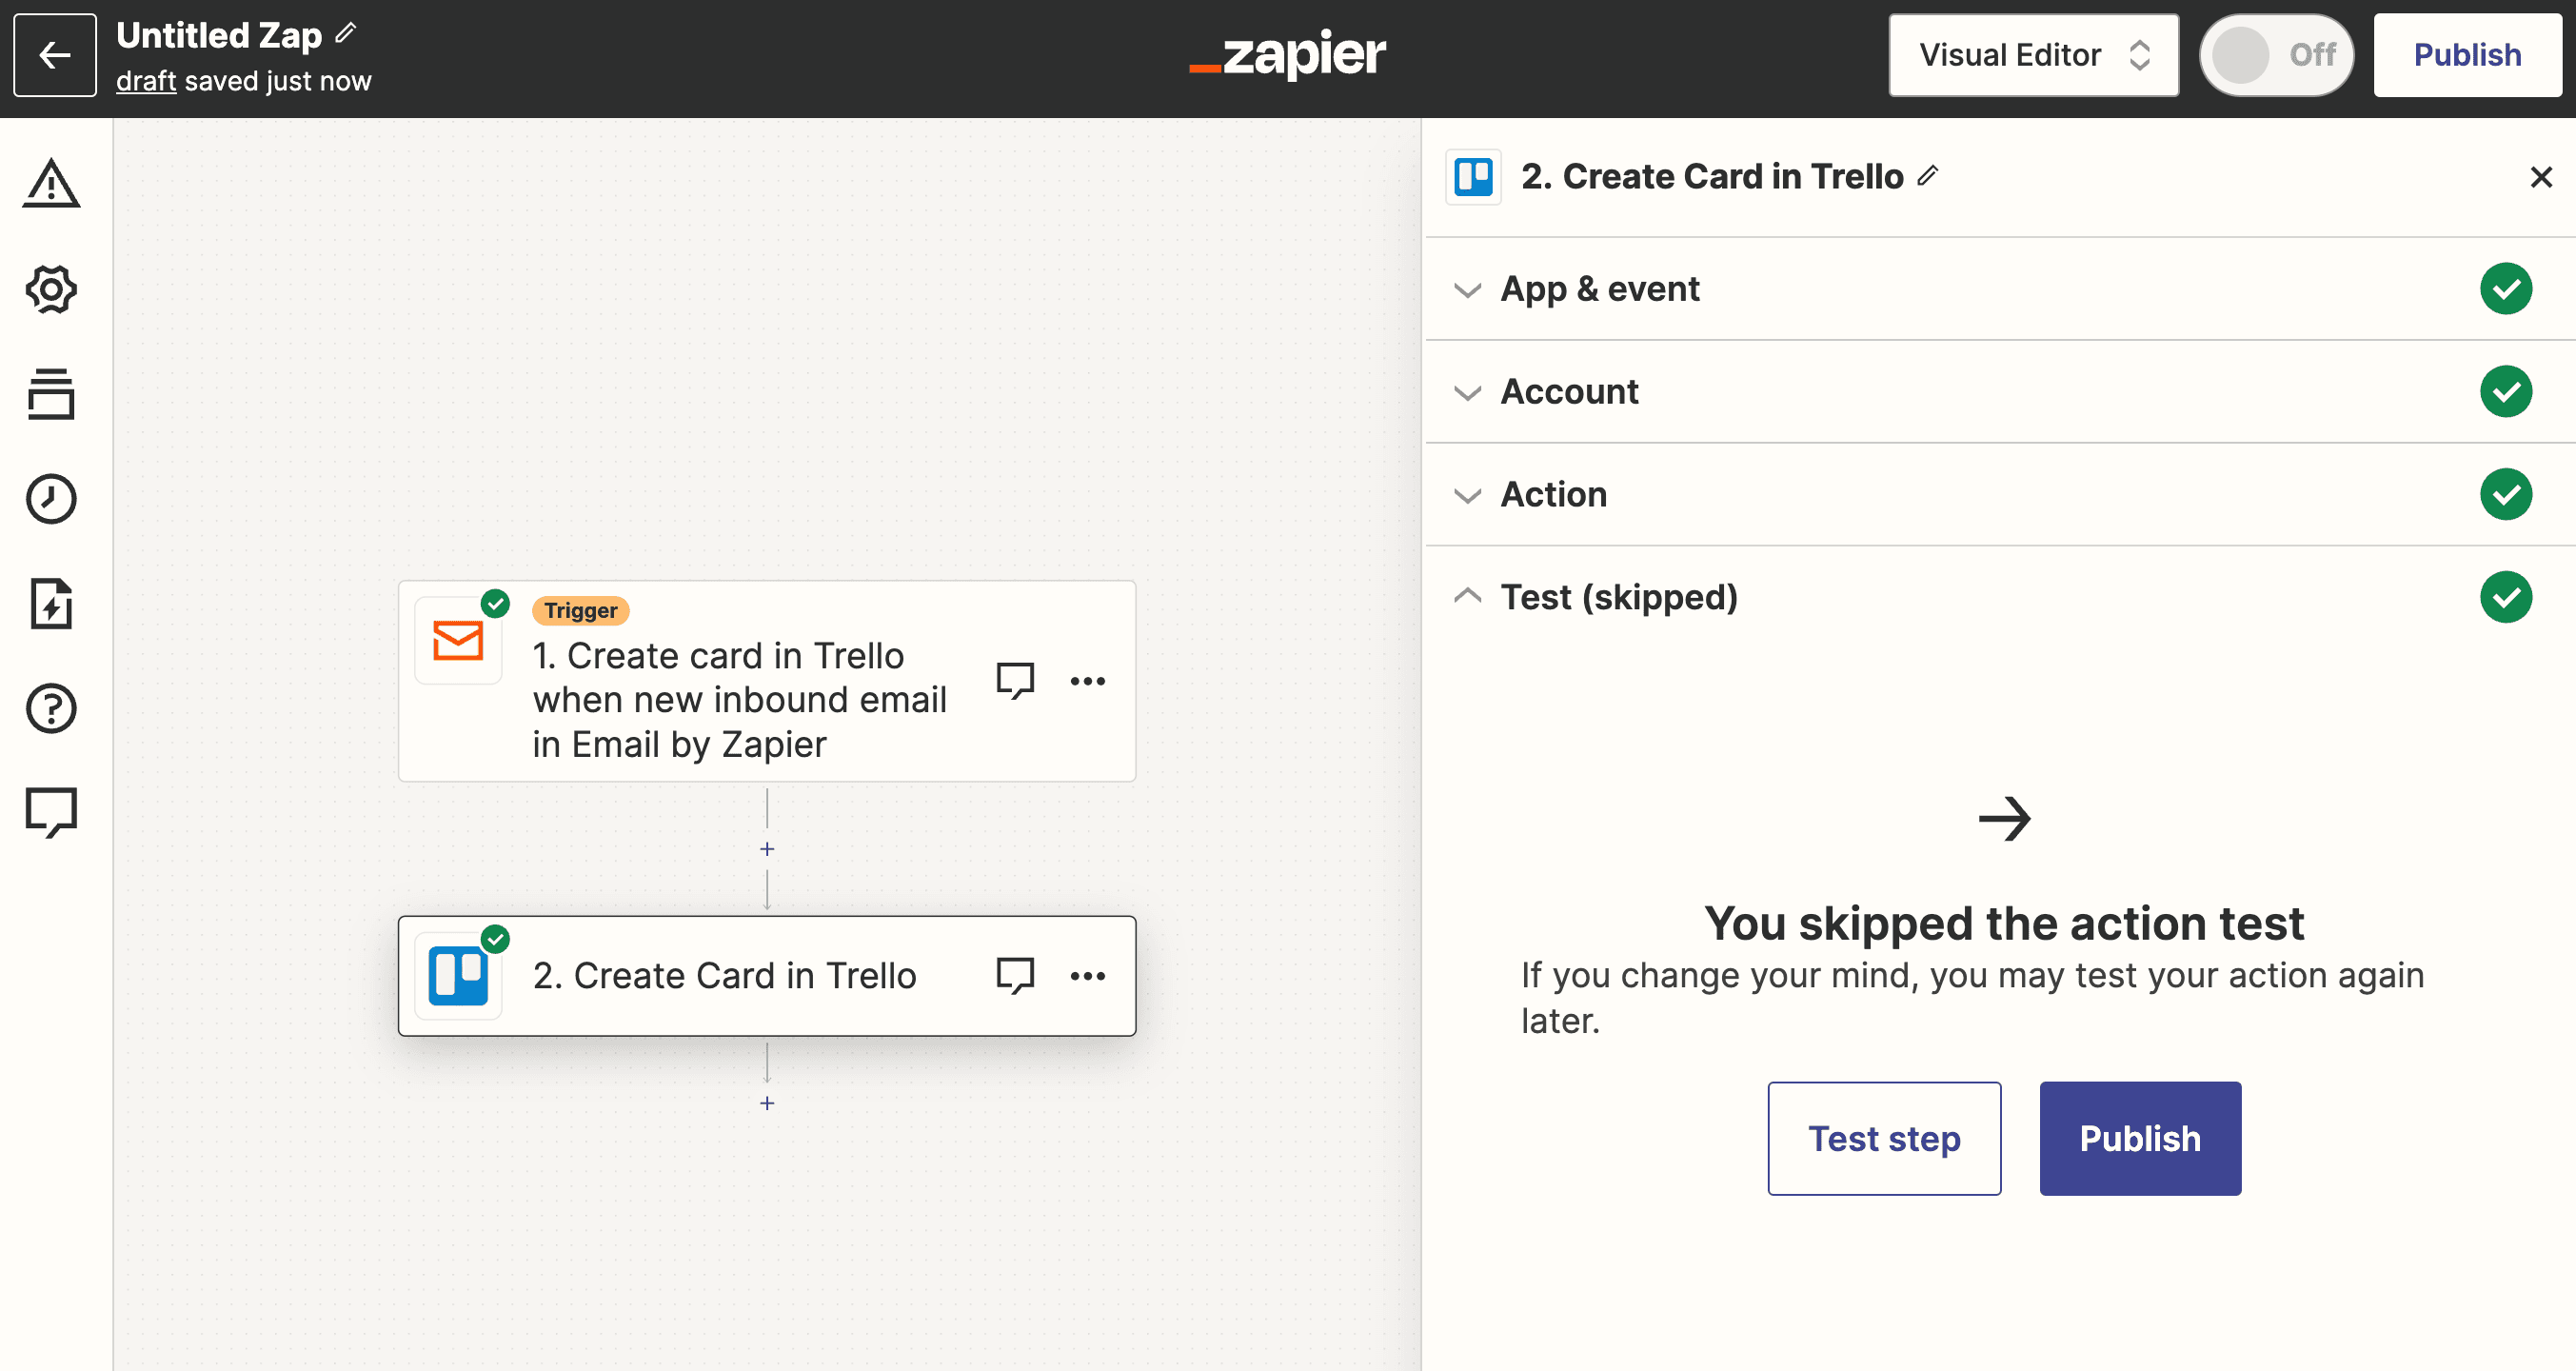
Once you’re happy with your template, click continue. We’re going to skip the Trello integration test because we’re going to do it ourselves by sending another bit of test feedback. Instead, hit ‘Publish’:
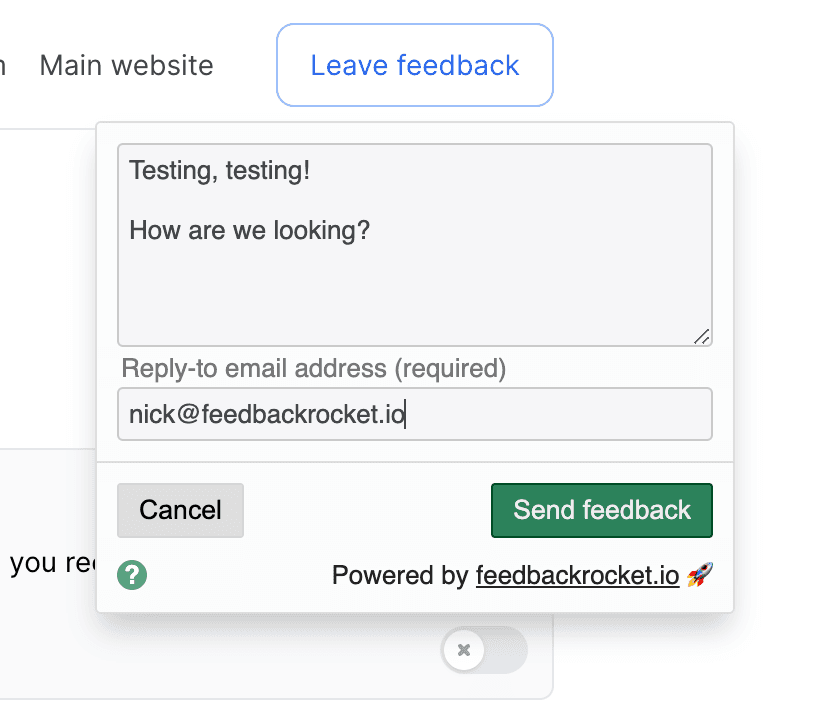
Let’s send one piece of test feedback to make sure everything is working end-to-end:
And double check things over on our Trello board:
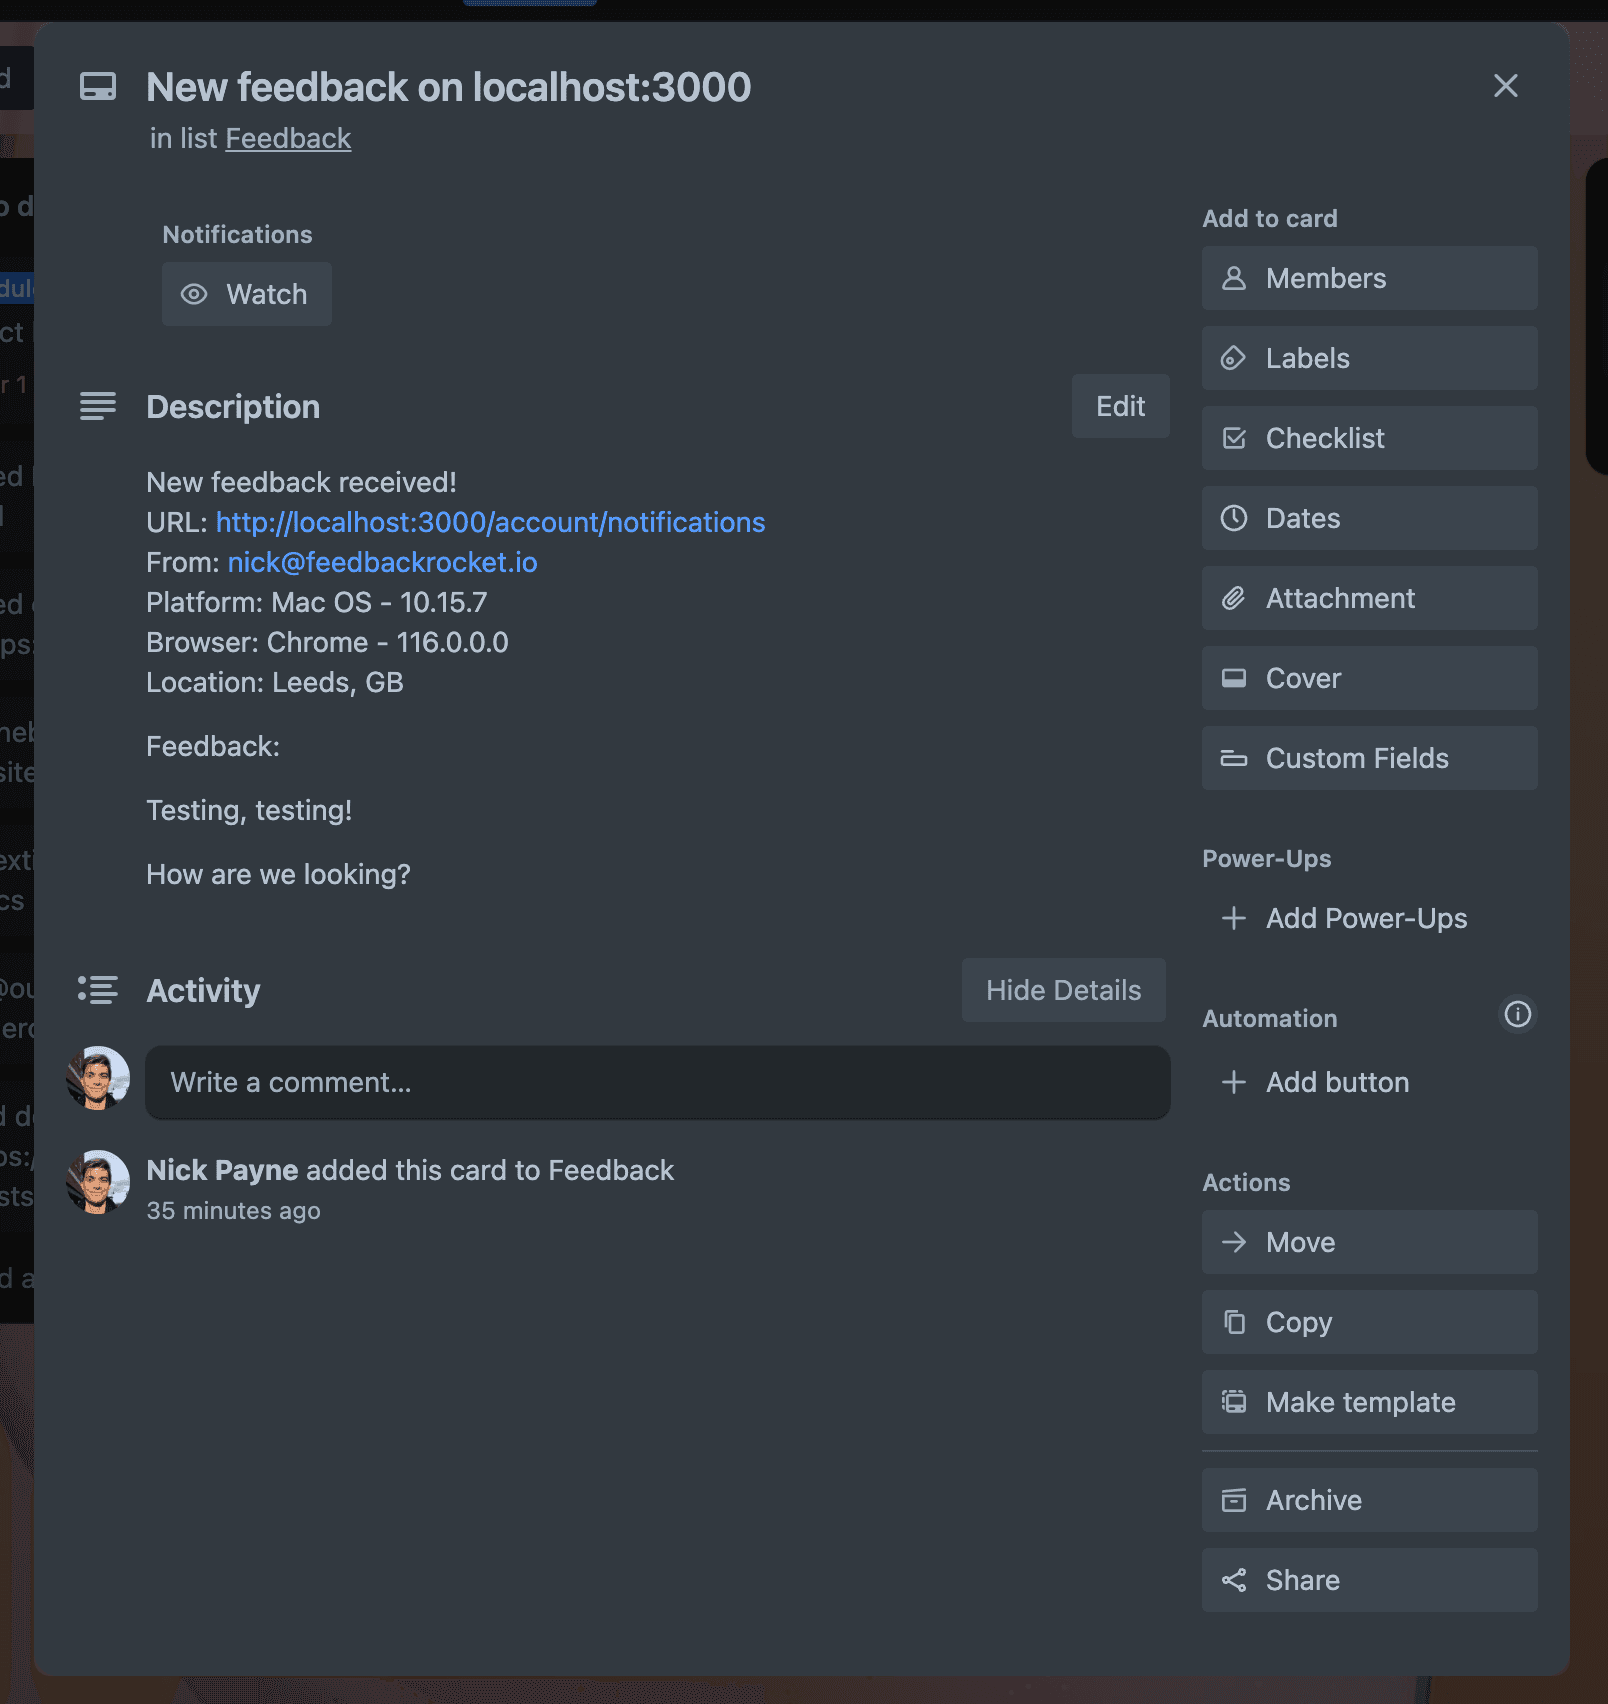
With that, we’re done! This exact same process can be used to connect to any of the 5,000+ applications Zapier integrates with. If you’re looking for inspiration, check out the Zapier app directory.